Create a Transcoding Template
The example will set up a template for a 4-run ABR ladder using H265 with the following resolutions and default template settings:
- ABR Ladder
- 360p - 400 kbps
- 480p - 800 kbps
- 720p - 2500 kbps
- 1080p - 4500 kbps
- Default:
- HLS Format
- Window Size
- Segment Duration
- Scaling Method
- Audio Stream settings
Create a Template in Bitstream
-
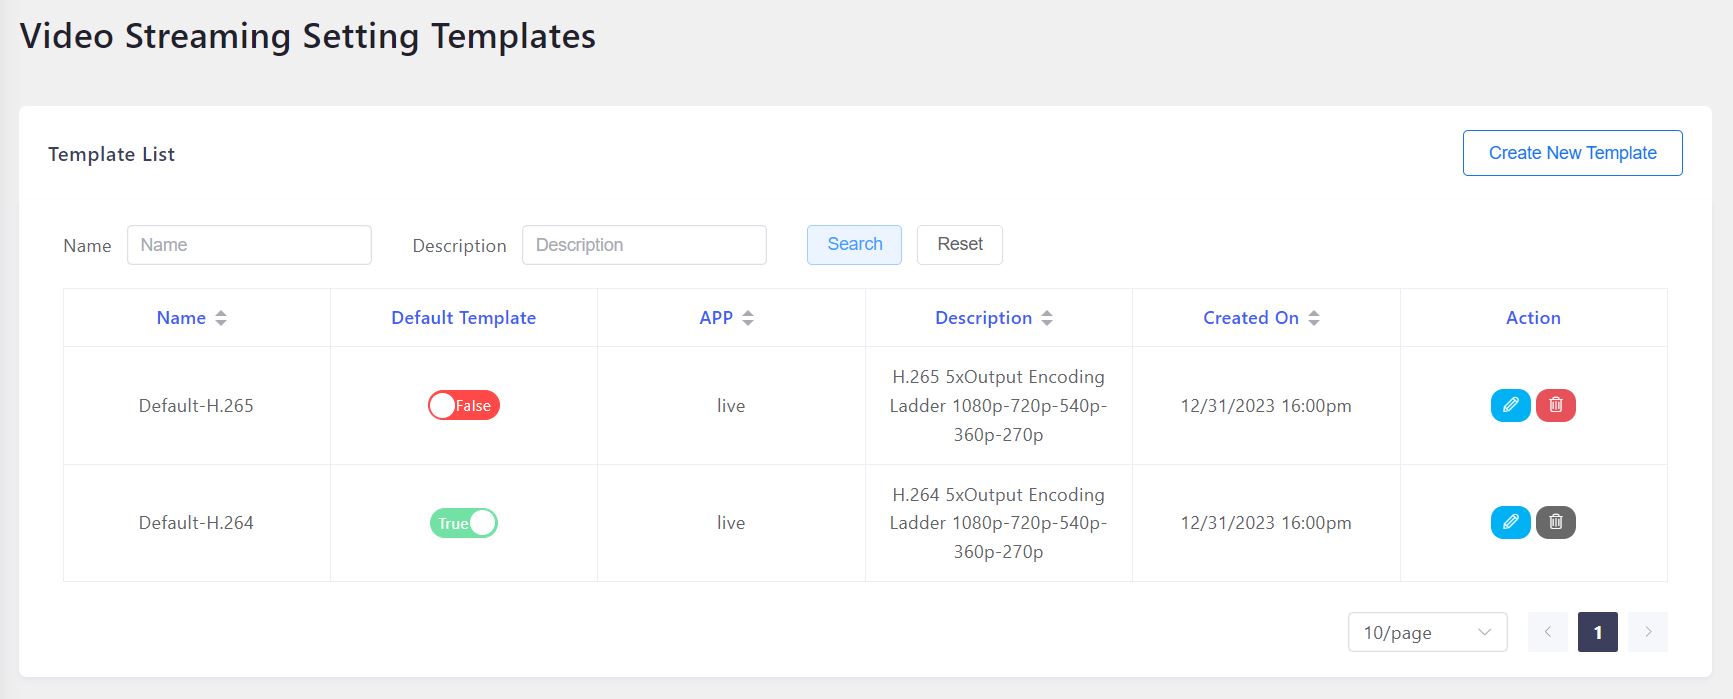
Select the "Templates" button in the Bitstreams Console, located on the left hand side.

-
The Templates interface is now shown, click the "Create New Template" button on the right hand side.
-
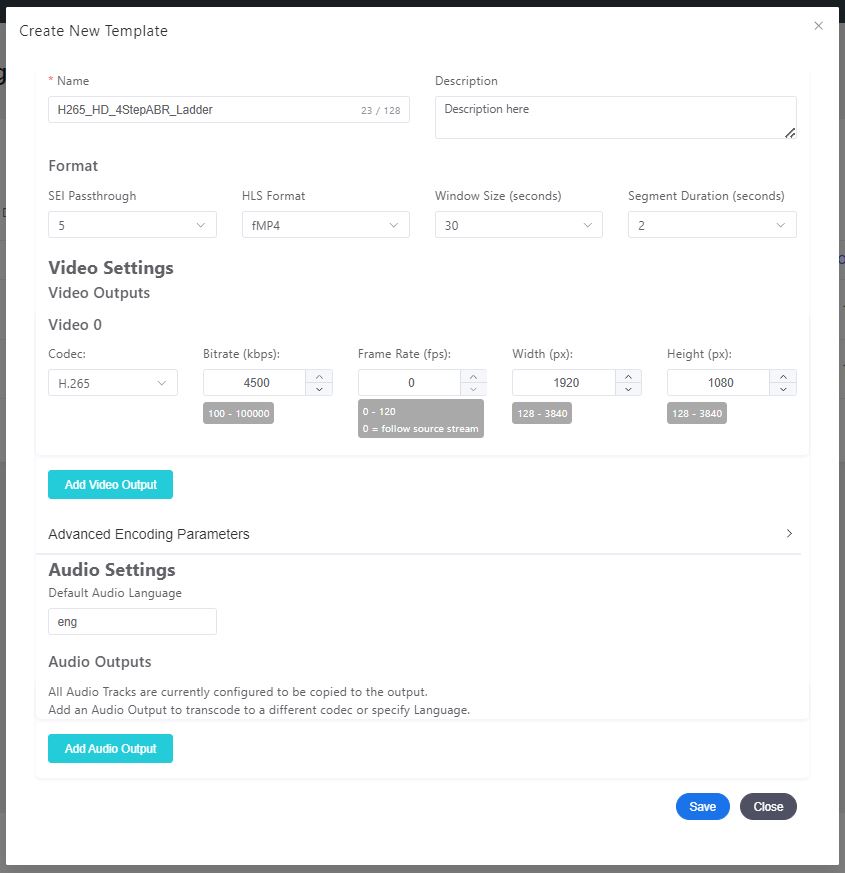
The next window will allow configuring a new template.
-
Create a name for the template, here I've used
H265_HD_4StepABR_Ladder. -
Add a description to describe your template settings.
-
Select the Development environment for now.
-
Use default Format settings.
- HLS Format = fMP4
- Window Size = 30 seconds
- Segment Duration = 2 seconds
-
Configure the video output for the first 1080p rung in the ladder (Video 0).
- Codec = H265
- Bitrate = 4500 kbps
- Framerate = 0 (Follow source stream)
- Width = 1920 px
- Height = 1080 px
-
Configure the audio output for the first 1080p rung in the ladder (Audio 0).
- Select the default audio language, "eng" has been used here.
- Click Add Audio Output and then configure it as required:
- The defaults have been used here
- Input Index = 0
- Language = copy
- Default Language = und (undetermined, see Appendix 1)
- Codec = Copy
- Channel = 0
- Profile = AAC-LC
- Bitrate = 128 kbps
- Sample Rate = 48 kHz
-
Press the Add Stream button to add another rung to the ladder and allow you to configure the video and audio settings for that rung. Continue until all the rungs have been added.
-
Add an overlay image if needed.
-
Once all the outputs have been configured, press the Save changes button at the bottom of the configuration window. The new template will be shown in the template list.

-
Add an Image Overlay
To add an image overlay to the video template, follow these steps:
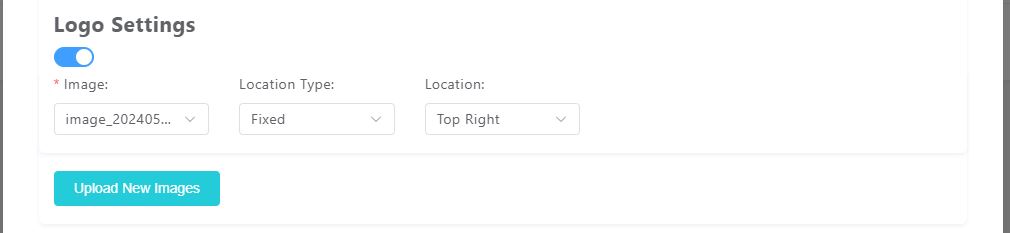
- Enable Logo Settings by clicking on the toggle button under Logo Settings
- If there are existing images uploaded, then select one to use under the "Image:" heading, otherwise upload a new image.
- Use the "Upload New Images" button to upload the image file you want to use as an overlay. Ensure the image is in jpg/jpeg/png format and does not exceed 2MB in size. The maximum resolution allowed is 480px, and the minimum is 32px.
- Once uploaded, select the image from the list of uploaded images to use as an overlay.
- Configure the overlay settings:
- Location Type: Choose between Fixed or Pixel. Fixed allows you to place the overlay in one of the four corners, while Pixel allows for precise placement using X and Y offsets.
- Location: If Fixed type is selected, choose from Top Left, Top Right, Bottom Left, or Bottom Right.
- X/Y-Offsets: If Pixel type is selected, specify the X and Y offsets. Positive X values move the overlay to the right, negative to the left. Positive Y values move the overlay upwards, negative downwards.
- After configuring the overlay settings, click the "Save" button to save the template changes.
The image overlay will be included in all streams generated using this template. If a stream was active when the template was modified, then the stream must be restarted for the template changes to take effect.
Use a Template with a Live Stream
See Create a Live Stream and use the new template instead of the Default-H.265 template in the example live stream configuration.